使用外部 MongoDB 服務
描述一個基於 Istio 的 Bookinfo 範例的簡單情境。
在使用外部 TCP 服務部落格文章中,我描述了網格內的 Istio 應用程式如何透過 TCP 使用外部服務。在這篇文章中,我將示範如何使用外部 MongoDB 服務。您將使用Istio Bookinfo 範例應用程式,該版本將書籍評分資料持久儲存在 MongoDB 資料庫中。您將此資料庫部署在叢集外部,並設定 ratings 微服務來使用它。您將學習控制外部 MongoDB 服務流量的多種選項及其優缺點。
使用外部評分資料庫的 Bookinfo
首先,您在 Kubernetes 叢集外部設定一個 MongoDB 資料庫實例,以保存書籍評分資料。然後,您修改Bookinfo 範例應用程式以使用您的資料庫。
設定評分資料庫
對於此任務,您設定一個MongoDB實例。您可以使用任何 MongoDB 實例;我使用了Compose for MongoDB。
為您的
admin使用者的密碼設定一個環境變數。為了防止密碼保留在 Bash 歷史記錄中,請在使用history -d執行命令後立即從歷史記錄中移除該命令。$ export MONGO_ADMIN_PASSWORD=<your MongoDB admin password>為您將建立的新使用者(即
bookinfo)的密碼設定一個環境變數。使用history -d從歷史記錄中移除該命令。$ export BOOKINFO_PASSWORD=<password>為您的 MongoDB 服務設定環境變數
MONGODB_HOST和MONGODB_PORT。建立
bookinfo使用者$ cat <<EOF | mongo --ssl --sslAllowInvalidCertificates $MONGODB_HOST:$MONGODB_PORT -u admin -p $MONGO_ADMIN_PASSWORD --authenticationDatabase admin use test db.createUser( { user: "bookinfo", pwd: "$BOOKINFO_PASSWORD", roles: [ "read"] } ); EOF建立一個 _集合_ 以保存評分。以下命令將兩個評分都設定為等於
1,以便在 Bookinfo _ratings_ 服務使用您的資料庫時提供視覺提示(預設的 Bookinfo _ratings_ 為4和5)。$ cat <<EOF | mongo --ssl --sslAllowInvalidCertificates $MONGODB_HOST:$MONGODB_PORT -u admin -p $MONGO_ADMIN_PASSWORD --authenticationDatabase admin use test db.createCollection("ratings"); db.ratings.insert( [{rating: 1}, {rating: 1}] ); EOF檢查
bookinfo使用者是否可以取得評分$ cat <<EOF | mongo --ssl --sslAllowInvalidCertificates $MONGODB_HOST:$MONGODB_PORT -u bookinfo -p $BOOKINFO_PASSWORD --authenticationDatabase test use test db.ratings.find({}); EOF輸出應類似於
MongoDB server version: 3.4.10
switched to db test
{ "_id" : ObjectId("5b7c29efd7596e65b6ed2572"), "rating" : 1 }
{ "_id" : ObjectId("5b7c29efd7596e65b6ed2573"), "rating" : 1 }
bye
Bookinfo 應用程式的初始設定
為了示範使用外部資料庫的情境,您首先需要有一個安裝了 Istio 的 Kubernetes 叢集。然後,您部署Istio Bookinfo 範例應用程式、套用預設目的地規則,並將 Istio 變更為預設封鎖出口的策略。
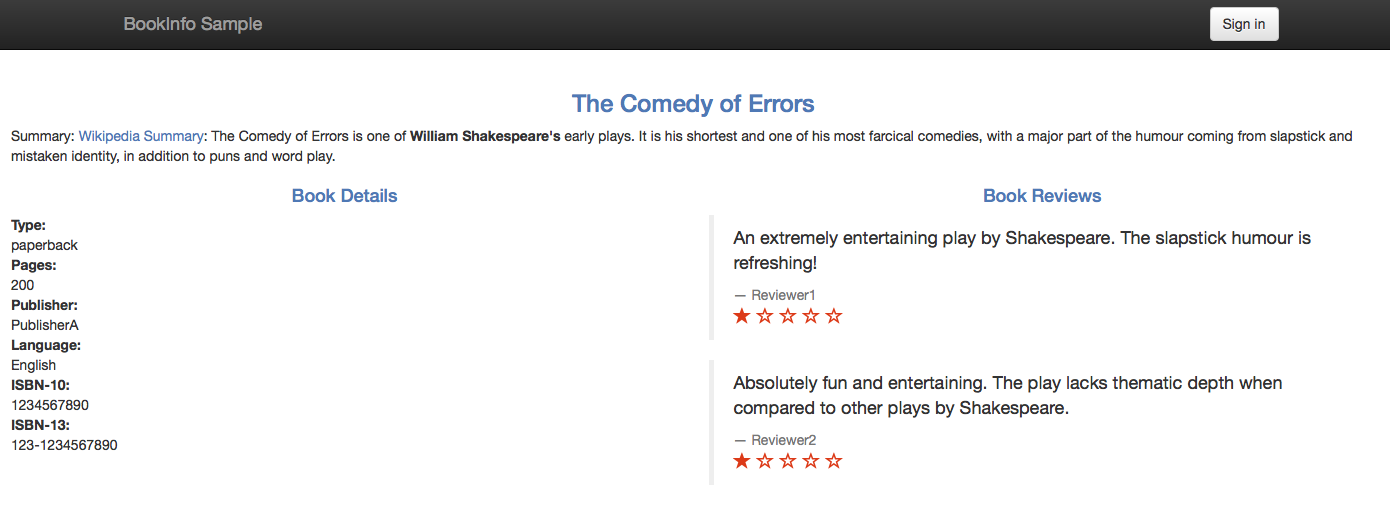
此應用程式使用 ratings 微服務來取得書籍評分,介於 1 到 5 之間的數字。評分會顯示為每個評論的星號。ratings 微服務有多個版本。您將在下一個小節中部署使用MongoDB 作為評分資料庫的版本。
本部落格文章中的範例命令適用於 Istio 1.0。
提醒您,以下是Bookinfo 範例應用程式中應用程式的端對端架構。

在 Bookinfo 應用程式中使用外部資料庫
部署使用 MongoDB 資料庫的 ratings 微服務規格 (ratings v2)
$ kubectl apply -f @samples/bookinfo/platform/kube/bookinfo-ratings-v2.yaml@
serviceaccount "bookinfo-ratings-v2" created
deployment "ratings-v2" created
將
MONGO_DB_URL環境變數更新為您的 MongoDB 值$ kubectl set env deployment/ratings-v2 "MONGO_DB_URL=mongodb://bookinfo:$BOOKINFO_PASSWORD@$MONGODB_HOST:$MONGODB_PORT/test?authSource=test&ssl=true" deployment.extensions/ratings-v2 env updated將所有發往 reviews 服務的流量路由到其 v3 版本。您這樣做是為了確保 reviews 服務始終呼叫 ratings 服務。此外,將所有發往 ratings 服務的流量路由到使用您的資料庫的 ratings v2。
透過新增兩個虛擬服務來指定上述兩個服務的路由。這些虛擬服務在 Istio 版本封存的
samples/bookinfo/networking/virtual-service-ratings-mongodb.yaml中指定。_**重要:**_ 確保您在執行以下命令之前套用了預設的目的地規則。$ kubectl apply -f @samples/bookinfo/networking/virtual-service-ratings-db.yaml@
更新後的架構如下所示。請注意,網格內的藍色箭頭標記了根據我們新增的虛擬服務設定的流量。根據虛擬服務,流量會傳送到 _reviews v3_ 和 _ratings v2_。

請注意,MongoDB 資料庫位於 Istio 服務網格之外,或者更準確地說,位於 Kubernetes 叢集之外。服務網格的邊界以虛線標記。
存取網頁
在確定入口 IP 和埠後,存取應用程式的網頁。
由於您尚未設定出口流量控制,因此 Istio 會封鎖對 MongoDB 服務的存取。這就是為什麼每個評論下方顯示的訊息是 _「評分服務目前無法使用」_ 而不是評分星號。

在以下章節中,您將使用 Istio 中不同的出口控制選項,設定對外部 MongoDB 服務的出口存取。
TCP 的出口控制
由於MongoDB Wire Protocol 在 TCP 之上執行,您可以將對 MongoDB 的出口流量控制為對任何其他外部 TCP 服務的流量。為了控制 TCP 流量,必須指定 CIDR 表示法中的 IP 區塊,其中包含您的 MongoDB 主機的 IP 位址。這裡的注意事項是,有時 MongoDB 主機的 IP 不穩定或事先未知。
如果 MongoDB 主機的 IP 不穩定,則出口流量可以作為 TLS 流量進行控制,或者可以直接路由流量,繞過 Istio Sidecar Proxy。
取得您的 MongoDB 資料庫實例的 IP 位址。作為一個選項,您可以使用 host 命令
$ export MONGODB_IP=$(host $MONGODB_HOST | grep " has address " | cut -d" " -f4)
在沒有閘道的情況下控制 TCP 出口流量
如果您不需要透過出口閘道路由流量,例如,如果您沒有要求所有離開網格的流量都必須透過閘道離開,請按照本節中的說明進行操作。或者,如果您想透過出口閘道路由流量,請繼續透過出口閘道直接路由 TCP 出口流量。
定義一個 TCP 網格外部服務條目
$ kubectl apply -f - <<EOF apiVersion: networking.istio.io/v1alpha3 kind: ServiceEntry metadata: name: mongo spec: hosts: - my-mongo.tcp.svc addresses: - $MONGODB_IP/32 ports: - number: $MONGODB_PORT name: tcp protocol: TCP location: MESH_EXTERNAL resolution: STATIC endpoints: - address: $MONGODB_IP EOF請注意,由於MongoDB 協定在 TLS 之上執行的情況下流量可以加密,因此指定了協定
TCP而不是MONGO。如果流量已加密,則加密的 MongoDB 協定無法由 Istio Proxy 剖析。如果您知道使用未加密的純 MongoDB 協定,您可以將協定指定為
MONGO,並讓 Istio Proxy 產生與 MongoDB 相關的統計資料。另請注意,當指定協定TCP時,配置不是 MongoDB 特有的,而是與任何其他基於 TCP 的協定的資料庫相同。請注意,您的 MongoDB 的主機未使用在 TCP 路由中,因此您可以使用任何主機,例如
my-mongo.tcp.svc。請注意STATIC解析和具有您的 MongoDB 服務 IP 的端點。定義此類端點後,您可以存取沒有網域名稱的 MongoDB 服務。重新整理應用程式的網頁。現在,應用程式應顯示沒有錯誤的評分
正確顯示書籍評分 請注意,如預期,您會看到兩個顯示的評論的評分都是一顆星。您將評分設定為一顆星,以便讓您視覺上清楚地知道您的外部資料庫確實正在使用中。
如果您想透過出口閘道路由流量,請繼續下一節。否則,請執行清理。
透過出口閘道直接路由 TCP 出口流量
在本節中,您將處理需要透過出口閘道路由流量的情況。Sidecar Proxy 會透過比對 MongoDB 主機的 IP(長度為 32 的 CIDR 區塊)將來自 MongoDB 用戶端的 TCP 連線路由到出口閘道。出口閘道會透過其主機名稱將流量轉發到 MongoDB 主機。
如果您沒有執行上一節中的步驟,請立即執行。
您可能希望在您的 MongoDB 用戶端的 Sidecar 代理程式與出口閘道之間啟用相互 TLS 驗證,以讓出口閘道監控來源 Pod 的身分,並根據該身分啟用 Mixer 原則強制執行。啟用相互 TLS 也會加密流量。如果您不想啟用相互 TLS,請繼續前往Sidecar 代理程式與出口閘道之間的相互 TLS章節。否則,請繼續前往下一節。
設定從 Sidecar 到出口閘道的 TCP 流量
定義
EGRESS_GATEWAY_MONGODB_PORT環境變數以保留某個用於將流量導向出口閘道的埠,例如7777。您必須選擇一個網格中沒有其他服務使用的埠。$ export EGRESS_GATEWAY_MONGODB_PORT=7777將選取的埠新增至
istio-egressgateway服務。您應該使用安裝 Istio 時使用的相同值,特別是您必須指定先前設定的istio-egressgateway服務的所有埠。$ helm template install/kubernetes/helm/istio/ --name istio-egressgateway --namespace istio-system -x charts/gateways/templates/deployment.yaml -x charts/gateways/templates/service.yaml --set gateways.istio-ingressgateway.enabled=false --set gateways.istio-egressgateway.enabled=true --set gateways.istio-egressgateway.ports[0].port=80 --set gateways.istio-egressgateway.ports[0].name=http --set gateways.istio-egressgateway.ports[1].port=443 --set gateways.istio-egressgateway.ports[1].name=https --set gateways.istio-egressgateway.ports[2].port=$EGRESS_GATEWAY_MONGODB_PORT --set gateways.istio-egressgateway.ports[2].name=mongo | kubectl apply -f -檢查
istio-egressgateway服務是否確實具有選取的埠$ kubectl get svc istio-egressgateway -n istio-system NAME TYPE CLUSTER-IP EXTERNAL-IP PORT(S) AGE istio-egressgateway ClusterIP 172.21.202.204 <none> 80/TCP,443/TCP,7777/TCP 34d停用
istio-egressgateway服務的相互 TLS 驗證$ kubectl apply -f - <<EOF apiVersion: authentication.istio.io/v1alpha1 kind: Policy metadata: name: istio-egressgateway namespace: istio-system spec: targets: - name: istio-egressgateway EOF為您的 MongoDB 服務建立出口
Gateway,以及目標規則和虛擬服務,以將流量導向出口閘道,並從出口閘道導向外部服務。$ kubectl apply -f - <<EOF apiVersion: networking.istio.io/v1alpha3 kind: Gateway metadata: name: istio-egressgateway spec: selector: istio: egressgateway servers: - port: number: $EGRESS_GATEWAY_MONGODB_PORT name: tcp protocol: TCP hosts: - my-mongo.tcp.svc --- apiVersion: networking.istio.io/v1alpha3 kind: DestinationRule metadata: name: egressgateway-for-mongo spec: host: istio-egressgateway.istio-system.svc.cluster.local subsets: - name: mongo --- apiVersion: networking.istio.io/v1alpha3 kind: DestinationRule metadata: name: mongo spec: host: my-mongo.tcp.svc --- apiVersion: networking.istio.io/v1alpha3 kind: VirtualService metadata: name: direct-mongo-through-egress-gateway spec: hosts: - my-mongo.tcp.svc gateways: - mesh - istio-egressgateway tcp: - match: - gateways: - mesh destinationSubnets: - $MONGODB_IP/32 port: $MONGODB_PORT route: - destination: host: istio-egressgateway.istio-system.svc.cluster.local subset: mongo port: number: $EGRESS_GATEWAY_MONGODB_PORT - match: - gateways: - istio-egressgateway port: $EGRESS_GATEWAY_MONGODB_PORT route: - destination: host: my-mongo.tcp.svc port: number: $MONGODB_PORT weight: 100 EOF
Sidecar 代理程式與出口閘道之間的相互 TLS
刪除先前的設定
$ kubectl delete gateway istio-egressgateway --ignore-not-found=true
$ kubectl delete virtualservice direct-mongo-through-egress-gateway --ignore-not-found=true
$ kubectl delete destinationrule egressgateway-for-mongo mongo --ignore-not-found=true
$ kubectl delete policy istio-egressgateway -n istio-system --ignore-not-found=true
對
istio-egressgateway服務強制執行相互 TLS 驗證$ kubectl apply -f - <<EOF apiVersion: authentication.istio.io/v1alpha1 kind: Policy metadata: name: istio-egressgateway namespace: istio-system spec: targets: - name: istio-egressgateway peers: - mtls: {} EOF為您的 MongoDB 服務建立出口
Gateway,以及目標規則和虛擬服務,以將流量導向出口閘道,並從出口閘道導向外部服務。$ kubectl apply -f - <<EOF apiVersion: networking.istio.io/v1alpha3 kind: Gateway metadata: name: istio-egressgateway spec: selector: istio: egressgateway servers: - port: number: 443 name: tls protocol: TLS hosts: - my-mongo.tcp.svc tls: mode: MUTUAL serverCertificate: /etc/certs/cert-chain.pem privateKey: /etc/certs/key.pem caCertificates: /etc/certs/root-cert.pem --- apiVersion: networking.istio.io/v1alpha3 kind: DestinationRule metadata: name: egressgateway-for-mongo spec: host: istio-egressgateway.istio-system.svc.cluster.local subsets: - name: mongo trafficPolicy: loadBalancer: simple: ROUND_ROBIN portLevelSettings: - port: number: 443 tls: mode: ISTIO_MUTUAL sni: my-mongo.tcp.svc --- apiVersion: networking.istio.io/v1alpha3 kind: DestinationRule metadata: name: mongo spec: host: my-mongo.tcp.svc --- apiVersion: networking.istio.io/v1alpha3 kind: VirtualService metadata: name: direct-mongo-through-egress-gateway spec: hosts: - my-mongo.tcp.svc gateways: - mesh - istio-egressgateway tcp: - match: - gateways: - mesh destinationSubnets: - $MONGODB_IP/32 port: $MONGODB_PORT route: - destination: host: istio-egressgateway.istio-system.svc.cluster.local subset: mongo port: number: 443 - match: - gateways: - istio-egressgateway port: 443 route: - destination: host: my-mongo.tcp.svc port: number: $MONGODB_PORT weight: 100 EOF繼續下一節。
驗證出口流量是否導向出口閘道
再次重新整理應用程式的網頁,並驗證評分是否仍然正確顯示。
檢查出口閘道的 Envoy 日誌,並查看一行對應到您對 MongoDB 服務的請求。如果 Istio 部署在
istio-system命名空間中,則用於列印日誌的命令為$ kubectl logs -l istio=egressgateway -n istio-system [2019-04-14T06:12:07.636Z] "- - -" 0 - "-" 1591 4393 94 - "-" "-" "-" "-" "<Your MongoDB IP>:<your MongoDB port>" outbound|<your MongoDB port>||my-mongo.tcp.svc 172.30.146.119:59924 172.30.146.119:443 172.30.230.1:59206 -
清理 TCP 出口流量控制
$ kubectl delete serviceentry mongo
$ kubectl delete gateway istio-egressgateway --ignore-not-found=true
$ kubectl delete virtualservice direct-mongo-through-egress-gateway --ignore-not-found=true
$ kubectl delete destinationrule egressgateway-for-mongo mongo --ignore-not-found=true
$ kubectl delete policy istio-egressgateway -n istio-system --ignore-not-found=true
TLS 的出口控制
在現實生活中,大多數與外部服務的通訊都必須加密,並且 MongoDB 協定在 TLS 之上運行。此外,TLS 用戶端通常會傳送 伺服器名稱指示 (SNI) 作為其交握的一部分。如果您的 MongoDB 伺服器執行 TLS,並且您的 MongoDB 用戶端傳送 SNI 作為交握的一部分,您可以像控制任何其他具有 SNI 的 TLS 流量一樣控制 MongoDB 出口流量。使用 TLS 和 SNI,您不需要指定 MongoDB 伺服器的 IP 位址。您改為指定其主機名稱,這更方便,因為您不必依賴 IP 位址的穩定性。您也可以指定萬用字元作為主機名稱的前綴,例如允許存取來自 *.com 網域的任何伺服器。
若要檢查您的 MongoDB 伺服器是否支援 TLS,請執行
$ openssl s_client -connect $MONGODB_HOST:$MONGODB_PORT -servername $MONGODB_HOST
如果以上命令列印出伺服器傳回的憑證,則該伺服器支援 TLS。如果沒有,您必須像先前章節所述在 TCP 層級控制 MongoDB 出口流量。
在沒有閘道的情況下控制 TLS 出口流量
如果您不需要出口閘道,請依照本節中的指示操作。如果您想透過出口閘道導向流量,請繼續前往透過出口閘道導向 TCP 出口流量。
為 MongoDB 服務建立
ServiceEntry$ kubectl apply -f - <<EOF apiVersion: networking.istio.io/v1alpha3 kind: ServiceEntry metadata: name: mongo spec: hosts: - $MONGODB_HOST ports: - number: $MONGODB_PORT name: tls protocol: TLS resolution: DNS EOF重新整理應用程式的網頁。應用程式應該會顯示評分且沒有錯誤。
清理 TLS 的出口設定
$ kubectl delete serviceentry mongo
透過出口閘道導向 TLS 出口流量
在本節中,您將處理需要透過出口閘道導向流量的情況。Sidecar 代理程式會透過比對 MongoDB 主機的 SNI,將來自 MongoDB 用戶端的 TLS 連線路由到出口閘道。出口閘道會將流量轉送至 MongoDB 主機。請注意,Sidecar 代理程式會將目的地埠重寫為 443。出口閘道會接受埠 443 上的 MongoDB 流量,依 SNI 比對 MongoDB 主機,並再次重寫埠以成為 MongoDB 伺服器的埠。
為 MongoDB 服務建立
ServiceEntry$ kubectl apply -f - <<EOF apiVersion: networking.istio.io/v1alpha3 kind: ServiceEntry metadata: name: mongo spec: hosts: - $MONGODB_HOST ports: - number: $MONGODB_PORT name: tls protocol: TLS - number: 443 name: tls-port-for-egress-gateway protocol: TLS resolution: DNS location: MESH_EXTERNAL EOF重新整理應用程式的網頁,並驗證評分是否正確顯示。
為您的 MongoDB 服務建立出口
Gateway,以及目標規則和虛擬服務,以將流量導向出口閘道,並從出口閘道導向外部服務。如果您想要在應用程式 Pod 的 Sidecar 代理程式與出口閘道之間啟用相互 TLS 驗證,請使用以下命令。(您可能希望啟用相互 TLS 以讓出口閘道監控來源 Pod 的身分,並根據該身分啟用 Mixer 原則強制執行。)
$ kubectl apply -f - <<EOF
apiVersion: networking.istio.io/v1alpha3
kind: Gateway
metadata:
  name: istio-egressgateway
spec:
  selector:
istio: egressgateway
  servers:
  - port:
  number: 443
  name: tls
  protocol: TLS
hosts:
- $MONGODB_HOST
tls:
  mode: MUTUAL
  serverCertificate: /etc/certs/cert-chain.pem
  privateKey: /etc/certs/key.pem
  caCertificates: /etc/certs/root-cert.pem
---
apiVersion: networking.istio.io/v1alpha3
kind: DestinationRule
metadata:
  name: egressgateway-for-mongo
spec:
  host: istio-egressgateway.istio-system.svc.cluster.local
  subsets:
  - name: mongo
trafficPolicy:
  loadBalancer:
    simple: ROUND_ROBIN
  portLevelSettings:
  - port:
      number: 443
    tls:
      mode: ISTIO_MUTUAL
      sni: $MONGODB_HOST
---
apiVersion: networking.istio.io/v1alpha3
kind: VirtualService
metadata:
  name: direct-mongo-through-egress-gateway
spec:
  hosts:
  - $MONGODB_HOST
  gateways:
  - mesh
  - istio-egressgateway
  tls:
  - match:
- gateways:
  - mesh
  port: $MONGODB_PORT
  sni_hosts:
  - $MONGODB_HOST
route:
- destination:
    host: istio-egressgateway.istio-system.svc.cluster.local
    subset: mongo
    port:
      number: 443
  tcp:
  - match:
- gateways:
  - istio-egressgateway
  port: 443
route:
- destination:
    host: $MONGODB_HOST
    port:
      number: $MONGODB_PORT
  weight: 100
EOF
$ kubectl apply -f - <<EOF apiVersion: networking.istio.io/v1alpha3 kind: Gateway metadata: name: istio-egressgateway spec: selector: istio: egressgateway servers: - port: number: 443 name: tls protocol: TLS hosts: - $MONGODB_HOST tls: mode: PASSTHROUGH --- apiVersion: networking.istio.io/v1alpha3 kind: DestinationRule metadata: name: egressgateway-for-mongo spec: host: istio-egressgateway.istio-system.svc.cluster.local subsets: - name: mongo --- apiVersion: networking.istio.io/v1alpha3 kind: VirtualService metadata: name: direct-mongo-through-egress-gateway spec: hosts: - $MONGODB_HOST gateways: - mesh - istio-egressgateway tls: - match: - gateways: - mesh port: $MONGODB_PORT sni_hosts: - $MONGODB_HOST route: - destination: host: istio-egressgateway.istio-system.svc.cluster.local subset: mongo port: number: 443 - match: - gateways: - istio-egressgateway port: 443 sni_hosts: - $MONGODB_HOST route: - destination: host: $MONGODB_HOST port: number: $MONGODB_PORT weight: 100 EOF
清理透過出口閘道導向 TLS 出口流量
$ kubectl delete serviceentry mongo
$ kubectl delete gateway istio-egressgateway
$ kubectl delete virtualservice direct-mongo-through-egress-gateway
$ kubectl delete destinationrule egressgateway-for-mongo
啟用 MongoDB TLS 出口流量至任意萬用字元網域
有時候您想要設定從相同網域到多個主機名稱的出口流量,例如從 *.<您的公司網域>.com 到所有 MongoDB 服務的流量。您不希望建立多個設定項目,每個 MongoDB 服務一個。若要透過單一設定設定存取來自相同網域的所有外部服務,您可以使用萬用字元主機。
在本節中,您將設定萬用字元網域的出口流量。我使用了 composedb.com 網域上的 MongoDB 執行個體,因此設定 *.com 的出口流量對我來說有效 (我也可以使用 *.composedb.com)。您可以根據您的 MongoDB 主機選擇萬用字元網域。
若要設定萬用字元網域的出口閘道流量,您首先需要部署一個具有額外 SNI 代理程式的自訂出口閘道。由於標準 Istio 出口閘道使用的代理程式 Envoy 的目前限制,因此需要這樣做。
準備一個具有 SNI 代理程式的新出口閘道
在本小節中,除了標準 Istio Envoy 代理程式之外,您還會部署一個具有 SNI 代理程式的出口閘道。您可以使用任何能夠根據任意、未預先設定的 SNI 值路由流量的 SNI 代理程式;我們使用 Nginx 來實現此功能。
為 Nginx SNI 代理程式建立設定檔。如果需要,您可能想要編輯該檔案以指定其他 Nginx 設定。
$ cat <<EOF > ./sni-proxy.conf
user www-data;

events {
}

stream {
  log_format log_stream '\$remote_addr [\$time_local] \$protocol [\$ssl_preread_server_name]'
  '\$status \$bytes_sent \$bytes_received \$session_time';

  access_log /var/log/nginx/access.log log_stream;
  error_log  /var/log/nginx/error.log;

  # tcp forward proxy by SNI
  server {
    resolver 8.8.8.8 ipv6=off;
    listen       127.0.0.1:$MONGODB_PORT;
    proxy_pass   \$ssl_preread_server_name:$MONGODB_PORT;
    ssl_preread  on;
  }
}
EOF
建立 Kubernetes ConfigMap 以保留 Nginx SNI 代理程式的設定
$ kubectl create configmap egress-sni-proxy-configmap -n istio-system --from-file=nginx.conf=./sni-proxy.conf以下命令將產生
istio-egressgateway-with-sni-proxy.yaml以進行編輯和部署。$ cat <<EOF | helm template install/kubernetes/helm/istio/ --name istio-egressgateway-with-sni-proxy --namespace istio-system -x charts/gateways/templates/deployment.yaml -x charts/gateways/templates/service.yaml -x charts/gateways/templates/serviceaccount.yaml -x charts/gateways/templates/autoscale.yaml -x charts/gateways/templates/role.yaml -x charts/gateways/templates/rolebindings.yaml --set global.mtls.enabled=true --set global.istioNamespace=istio-system -f - > ./istio-egressgateway-with-sni-proxy.yaml gateways: enabled: true istio-ingressgateway: enabled: false istio-egressgateway: enabled: false istio-egressgateway-with-sni-proxy: enabled: true labels: app: istio-egressgateway-with-sni-proxy istio: egressgateway-with-sni-proxy replicaCount: 1 autoscaleMin: 1 autoscaleMax: 5 cpu: targetAverageUtilization: 80 serviceAnnotations: {} type: ClusterIP ports: - port: 443 name: https secretVolumes: - name: egressgateway-certs secretName: istio-egressgateway-certs mountPath: /etc/istio/egressgateway-certs - name: egressgateway-ca-certs secretName: istio-egressgateway-ca-certs mountPath: /etc/istio/egressgateway-ca-certs configVolumes: - name: sni-proxy-config configMapName: egress-sni-proxy-configmap additionalContainers: - name: sni-proxy image: nginx volumeMounts: - name: sni-proxy-config mountPath: /etc/nginx readOnly: true EOF部署新的出口閘道
$ kubectl apply -f ./istio-egressgateway-with-sni-proxy.yaml
serviceaccount "istio-egressgateway-with-sni-proxy-service-account" created
role "istio-egressgateway-with-sni-proxy-istio-system" created
rolebinding "istio-egressgateway-with-sni-proxy-istio-system" created
service "istio-egressgateway-with-sni-proxy" created
deployment "istio-egressgateway-with-sni-proxy" created
horizontalpodautoscaler "istio-egressgateway-with-sni-proxy" created
驗證新的出口閘道是否正在執行。請注意,Pod 有兩個容器 (一個是 Envoy 代理程式,另一個是 SNI 代理程式)。
$ kubectl get pod -l istio=egressgateway-with-sni-proxy -n istio-system
NAME                                                  READY     STATUS    RESTARTS   AGE
istio-egressgateway-with-sni-proxy-79f6744569-pf9t2   2/2       Running   0          17s
建立靜態位址等於 127.0.0.1 (
localhost) 的服務項目,並停用導向新服務項目的流量上的相互 TLS$ kubectl apply -f - <<EOF apiVersion: networking.istio.io/v1alpha3 kind: ServiceEntry metadata: name: sni-proxy spec: hosts: - sni-proxy.local location: MESH_EXTERNAL ports: - number: $MONGODB_PORT name: tcp protocol: TCP resolution: STATIC endpoints: - address: 127.0.0.1 --- apiVersion: networking.istio.io/v1alpha3 kind: DestinationRule metadata: name: disable-mtls-for-sni-proxy spec: host: sni-proxy.local trafficPolicy: tls: mode: DISABLE EOF
使用新的出口閘道設定存取 *.com
為
*.com定義ServiceEntry$ cat <<EOF | kubectl create -f - apiVersion: networking.istio.io/v1alpha3 kind: ServiceEntry metadata: name: mongo spec: hosts: - "*.com" ports: - number: 443 name: tls protocol: TLS - number: $MONGODB_PORT name: tls-mongodb protocol: TLS location: MESH_EXTERNAL EOF為 *.com、埠 443、協定 TLS 建立出口
Gateway、設定閘道 SNI 的目標規則,以及防止惡意應用程式竄改 SNI 的 Envoy 篩選器 (篩選器會驗證應用程式發出的 SNI 是否為回報給 Mixer 的 SNI)。$ kubectl apply -f - <<EOF apiVersion: networking.istio.io/v1alpha3 kind: Gateway metadata: name: istio-egressgateway-with-sni-proxy spec: selector: istio: egressgateway-with-sni-proxy servers: - port: number: 443 name: tls protocol: TLS hosts: - "*.com" tls: mode: MUTUAL serverCertificate: /etc/certs/cert-chain.pem privateKey: /etc/certs/key.pem caCertificates: /etc/certs/root-cert.pem --- apiVersion: networking.istio.io/v1alpha3 kind: DestinationRule metadata: name: mtls-for-egress-gateway spec: host: istio-egressgateway-with-sni-proxy.istio-system.svc.cluster.local subsets: - name: mongo trafficPolicy: loadBalancer: simple: ROUND_ROBIN portLevelSettings: - port: number: 443 tls: mode: ISTIO_MUTUAL --- # The following filter is used to forward the original SNI (sent by the application) as the SNI of the mutual TLS # connection. # The forwarded SNI will be reported to Mixer so that policies will be enforced based on the original SNI value. apiVersion: networking.istio.io/v1alpha3 kind: EnvoyFilter metadata: name: forward-downstream-sni spec: filters: - listenerMatch: portNumber: $MONGODB_PORT listenerType: SIDECAR_OUTBOUND filterName: forward_downstream_sni filterType: NETWORK filterConfig: {} --- # The following filter verifies that the SNI of the mutual TLS connection (the SNI reported to Mixer) is # identical to the original SNI issued by the application (the SNI used for routing by the SNI proxy). # The filter prevents Mixer from being deceived by a malicious application: routing to one SNI while # reporting some other value of SNI. If the original SNI does not match the SNI of the mutual TLS connection, the # filter will block the connection to the external service. apiVersion: networking.istio.io/v1alpha3 kind: EnvoyFilter metadata: name: egress-gateway-sni-verifier spec: workloadLabels: app: istio-egressgateway-with-sni-proxy filters: - listenerMatch: portNumber: 443 listenerType: GATEWAY filterName: sni_verifier filterType: NETWORK filterConfig: {} EOF將前往 *.com 的流量路由到出口閘道,並從出口閘道路由到 SNI 代理程式。
$ kubectl apply -f - <<EOF
apiVersion: networking.istio.io/v1alpha3
kind: VirtualService
metadata:
  name: direct-mongo-through-egress-gateway
spec:
  hosts:
  - "*.com"
  gateways:
  - mesh
  - istio-egressgateway-with-sni-proxy
  tls:
  - match:
    - gateways:
      - mesh
      port: $MONGODB_PORT
      sni_hosts:
      - "*.com"
    route:
    - destination:
        host: istio-egressgateway-with-sni-proxy.istio-system.svc.cluster.local
        subset: mongo
        port:
          number: 443
      weight: 100
  tcp:
  - match:
    - gateways:
      - istio-egressgateway-with-sni-proxy
      port: 443
    route:
    - destination:
        host: sni-proxy.local
        port:
          number: $MONGODB_PORT
      weight: 100
EOF
再次重新整理應用程式的網頁,並驗證評分是否仍然正確顯示。
檢查出口閘道的 Envoy 代理程式的日誌。如果 Istio 部署在
istio-system命名空間中,則用於列印日誌的命令為$ kubectl logs -l istio=egressgateway-with-sni-proxy -c istio-proxy -n istio-system您應該會看到類似以下的行
[2019-01-02T17:22:04.602Z] "- - -" 0 - 768 1863 88 - "-" "-" "-" "-" "127.0.0.1:28543" outbound|28543||sni-proxy.local 127.0.0.1:49976 172.30.146.115:443 172.30.146.118:58510 <your MongoDB host>
[2019-01-02T17:22:04.713Z] "- - -" 0 - 1534 2590 85 - "-" "-" "-" "-" "127.0.0.1:28543" outbound|28543||sni-proxy.local 127.0.0.1:49988 172.30.146.115:443 172.30.146.118:58522 <your MongoDB host>
檢查 SNI 代理程式的日誌。如果 Istio 部署在
istio-system命名空間中,則用於列印日誌的命令為$ kubectl logs -l istio=egressgateway-with-sni-proxy -n istio-system -c sni-proxy 127.0.0.1 [23/Aug/2018:03:28:18 +0000] TCP [<your MongoDB host>]200 1863 482 0.089 127.0.0.1 [23/Aug/2018:03:28:18 +0000] TCP [<your MongoDB host>]200 2590 1248 0.095
了解發生的情況
在本節中,您使用萬用字元網域設定了到 MongoDB 主機的出口流量。雖然對於單一 MongoDB 主機而言,使用萬用字元網域沒有好處 (可以指定確切的主機名稱),但對於叢集中應用程式存取符合某些萬用字元網域的多個 MongoDB 主機的情況,這可能會有所幫助。例如,如果應用程式存取 mongodb1.composedb.com、mongodb2.composedb.com 和 mongodb3.composedb.com,則可以使用適用於萬用字元網域 *.composedb.com 的單一設定來設定出口流量。
我將把它留給讀者作為練習,以驗證當您設定應用程式使用另一個具有符合本節中使用的萬用字元網域的主機名稱的 MongoDB 執行個體時,不需要其他 Istio 設定。
清理 MongoDB TLS 出口流量至任意萬用字元網域的設定
刪除 *.com 的設定項目
$ kubectl delete serviceentry mongo
$ kubectl delete gateway istio-egressgateway-with-sni-proxy
$ kubectl delete virtualservice direct-mongo-through-egress-gateway
$ kubectl delete destinationrule mtls-for-egress-gateway
$ kubectl delete envoyfilter forward-downstream-sni egress-gateway-sni-verifier
刪除
egressgateway-with-sni-proxy部署的設定項目$ kubectl delete serviceentry sni-proxy $ kubectl delete destinationrule disable-mtls-for-sni-proxy $ kubectl delete -f ./istio-egressgateway-with-sni-proxy.yaml $ kubectl delete configmap egress-sni-proxy-configmap -n istio-system移除您建立的設定檔
$ rm ./istio-egressgateway-with-sni-proxy.yaml
$ rm ./nginx-sni-proxy.conf
清理
刪除
bookinfo使用者$ cat <<EOF | mongo --ssl --sslAllowInvalidCertificates $MONGODB_HOST:$MONGODB_PORT -u admin -p $MONGO_ADMIN_PASSWORD --authenticationDatabase admin use test db.dropUser("bookinfo"); EOF刪除 ratings 集合
$ cat <<EOF | mongo --ssl --sslAllowInvalidCertificates $MONGODB_HOST:$MONGODB_PORT -u admin -p $MONGO_ADMIN_PASSWORD --authenticationDatabase admin
use test
db.ratings.drop();
EOF
取消設定您使用的環境變數
$ unset MONGO_ADMIN_PASSWORD BOOKINFO_PASSWORD MONGODB_HOST MONGODB_PORT MONGODB_IP移除虛擬服務
$ kubectl delete -f @samples/bookinfo/networking/virtual-service-ratings-db.yaml@
Deleted config: virtual-service/default/reviews
Deleted config: virtual-service/default/ratings
取消部署 ratings v2-mongodb
$ kubectl delete -f @samples/bookinfo/platform/kube/bookinfo-ratings-v2.yaml@
deployment "ratings-v2" deleted
結論
在這篇部落格文章中,我示範了 MongoDB 出口流量控制的各種選項。您可以在適用的情況下,在 TCP 或 TLS 層級控制 MongoDB 出口流量。在 TCP 和 TLS 案例中,您可以根據您組織的安全需求,將流量從 Sidecar 代理程式直接導向外部 MongoDB 主機,或透過出口閘道導向流量。在後一種情況下,您還可以決定在 Sidecar 代理程式與出口閘道之間套用或停用相互 TLS 驗證。如果您想在 TLS 層級透過指定類似 *.com 的萬用字元網域來控制 MongoDB 出口流量,並且您需要透過出口閘道導向流量,則必須部署具有 SNI 代理程式的自訂出口閘道。
請注意,這篇部落格文章中針對 MongoDB 描述的設定和考量,對於 TCP/TLS 之上的其他非 HTTP 協定而言幾乎相同。


